
Search the Community
Showing results for tags 'modding'.
Found 11 results
-
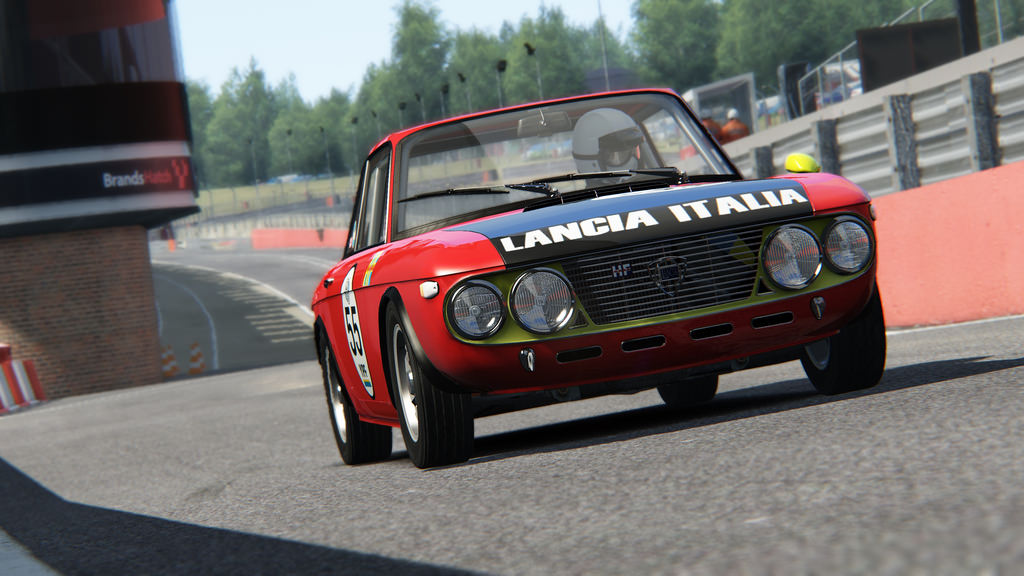 E' passato un pò di tempo da quando vi abbiamo segnalato l'ultima volta le vetture modding da non perdere per Assetto Corsa. Ecco quindi qui di seguito una lista aggiornata di quelli che, secondo noi, sono i migliori mod auto realizzati dagli appassionati del simulatore targato Kunos Simulazioni, che dovreste immediatamente correre a scaricare, se non li avete già nei vostri PC! Segnalateci qui sotto le vostre vetture preferite ovviamente. Honda NSX Formula 3 RSR Ferrari F2002 Rallylegends Mod - Ford Fiesta RS WRC Subaru Impreza WRX McLaren Honda MP4/4 Need for Speed Tournament Class A Lancia Fulvia 1.6 Ferrari 288 GTO Formula RSS 3 V6 Skip Barber Rallylegends Mod - Lancia Delta S4 Cupra Leon Competición
 -
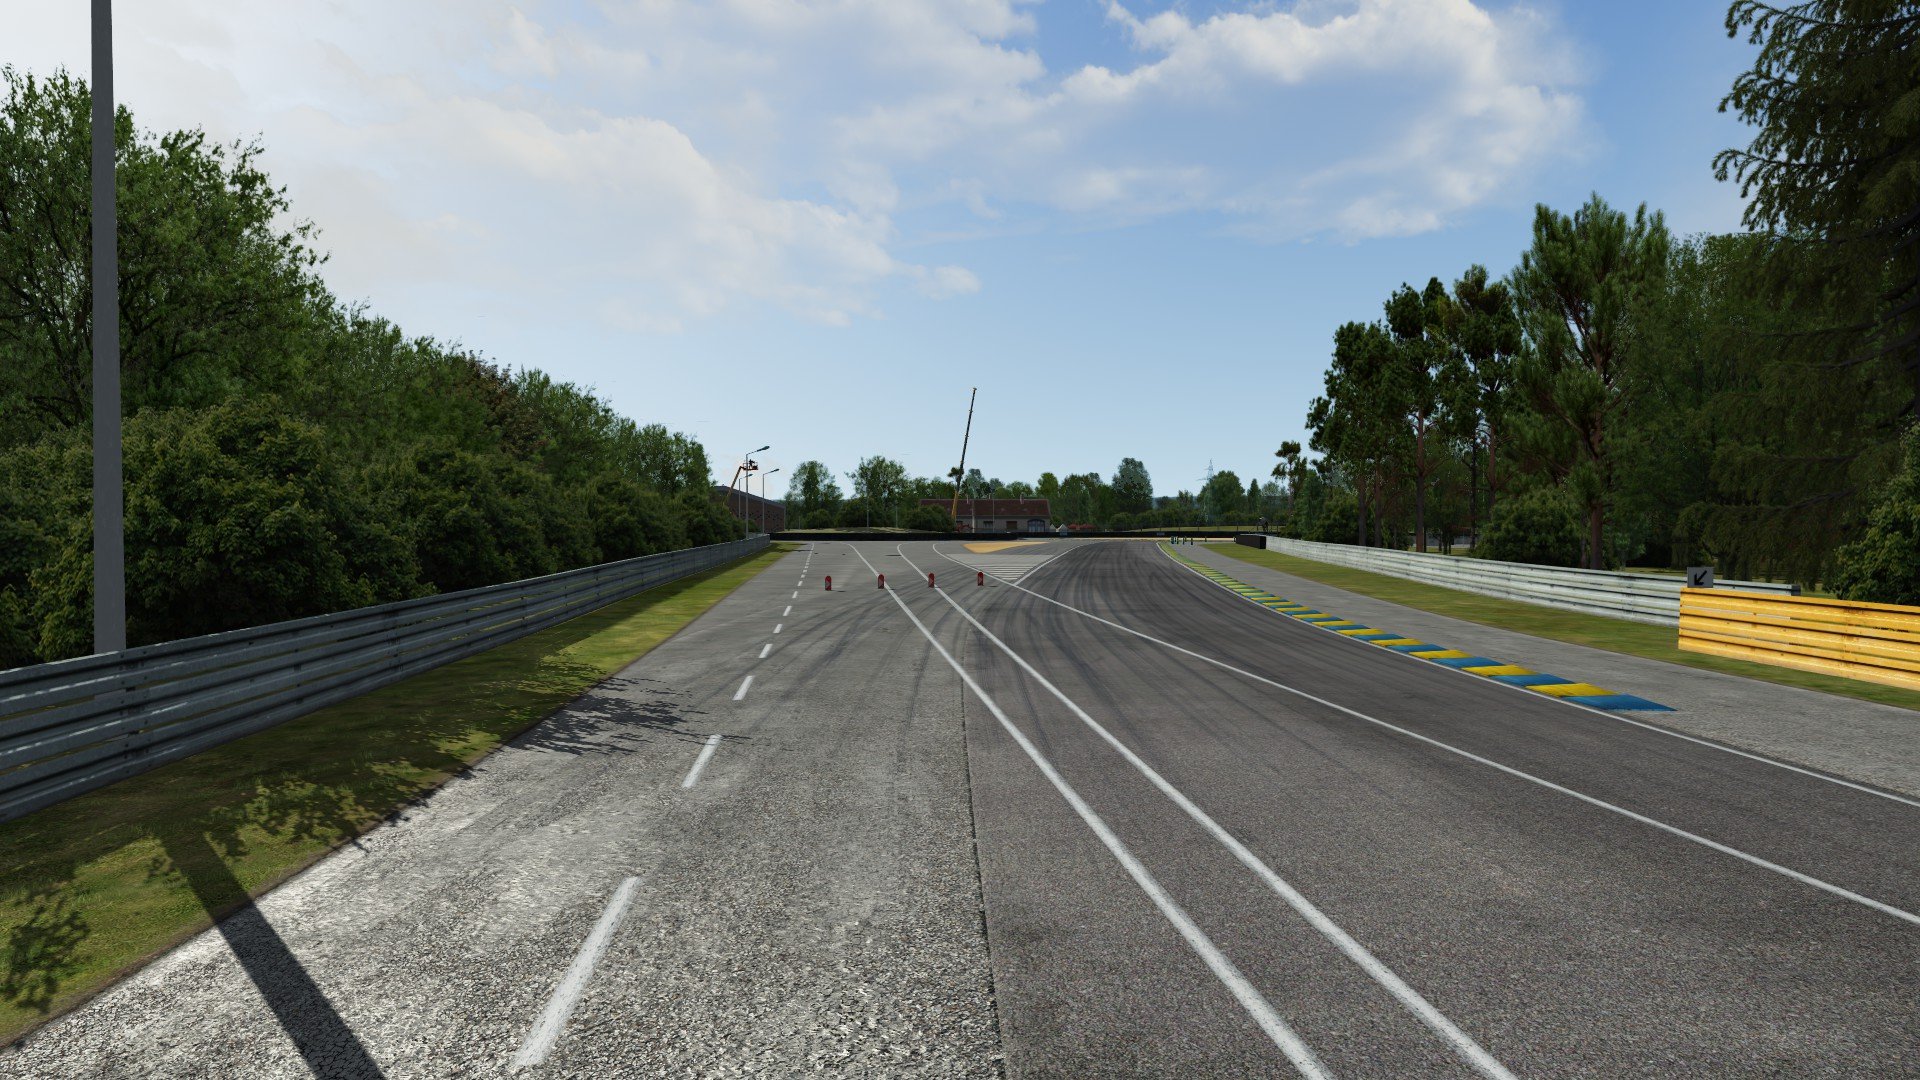 L'estate è probabilmente il periodo migliore per preparare la propria copia di Assetto Corsa scaricando i circuiti modding più apprezzati ed interessanti, per poterseli poi godere in pieno alla guida con l'arrivo del fresco... Vi segnaliamo quindi qui di seguito i tracciati addon più scaricati, più apprezzati ed anche quelli che ci piacciono di più! Le Mans 2017 24H by Tiago Lima Doniington Park by Brun Los Angeles Canyons by Phoenix Bridgehampton Race by Lilski Paul Ricard by Strarck Bathurst by Rseb Tsukuba by Tiago Lima Cadwell Park by Terra21 Algarve International Circuit by Tiago Lima Daytona 2017 by Terra21
 -
Lesson 1: Getting Started - Done Lesson 2: Your First Skin - Done Lesson 3: Layer Management - Done Coffee Break 1: Project Folder Management - Done Lesson 4: Painting Rims - Done Coffee Break 2: Saving Time! (Heh heh, get it?) - Done Too much to read? Use your browsers search function to find the lessons more easily. Lesson 1 is L1, Lesson 2 is L2, Coffee Break 1 is CB1, and so on. Specials: Helmet Painting Session (2hrs) (Video) Basic Painting in Photoshop CS2 (Video) Painting the Blancpain 2013 Number Plates (2hrs) (Video) Read the Frequently Asked Questions by clicking HERE before starting! Lesson 1: Getting Started L1 Ever wanted to make your own livery in Assetto Corsa? Psh, yea! This guide is dedicated to achieving that dream in the way that I found out how. First of all you need a painting program to edit the car templates. The most popular programs (which are all free!) are Adobe Photoshop, Paint.net, and Gimp. Adobe provides CS2 for free now and it is just as good as any other program. If you chose that one remember to take note of the Serial number that they provide to you. For the examples you see here I will be using Adobe Photoshop for the most part. There are minor differences here and there, but all should be able to stand up to the task. Feel free to use any photo editor that you desire. Now that you have your paint program you will also have to grab the NVIDIA Texture Tools. After installing NVIDIA Texture Tools it should work seamlessly with your photo editor of choice. The reason you will need this is to save your template into a file format (.dds) that the game will be able to recognize. (If you are having DDS saving troubles try this download and install instead. https://developer.nvidia.com/sites/...ls/files/Photoshop_Plugins_8.55.0109.1800.exe) Now you will want to pick up a car template. Go ahead and get the Official Ferrari 458 template. Until we get some official GT templates this is what we will wok with for now. http://www.assettocorsa.net/forum/index.php?threads/official-car-templates.2720/ It is going to be a .zip so make sure you have a program to unzip it. After extracting the files you will find this stuff. Hopefully your editor will be able to open the .psd file. Do not worry about the other files for now. The psd a file that was made and/or saved in Photoshop. I know that the users of paint.net will have to install this plugin to be able to use psd files. Photoshop GIMP Paint.net Your program should look like one of the above after opening the psd. Awesome! It looks like we have officially got started! Next we will look at making your first skin in Lesson 2! Lesson 1: Getting Started Lesson 2: Your First Skin Coffee Break 1: ??? Lesson 3: ??? Lesson 4: ??? Coffee Break 2: ??? Lesson 2: Your First Skin L2 This lesson is split onto 6 parts for slightly easier navigation. Part 1: So, how do we look at skins again? – Showroom setup Part 2: A whole new world – Skin Folder Setup Part 3: Now let’s start painting! Part 4: DDS Me – DDS Export Part 5: Can you see it now? – Skin Preview Part 6: Ideas for the future Part 1: So, how do we look at skins again? – Showroom setup The program that you will use for the time being is the Showroom found in Assetto Corsa itself. You can view it using the 360 button when you are viewing the specific car info in Assetto Corsa. Protip #1 - You can manually launch the showroom by running acShowroom.exe located in the main folder of your AC install. You don’t even need to launch Assetto Corsa to be able to access the showroom! You will have to view the desired car and skin combo in the game before using the shortcut though. Doing this creates a “pointer” that the acShowroom.exe uses later. For better accessibility when skinning you can make a shortcut of acShowroom.exe and put it on your desktop or even bind a key on your keyboard if you want. Protip #2 - Want to have your own music in the showroom or silence it completely? Navigate to C:\...\assettocorsa\content\showroom. Open the showroom folder of your choice and you will see track.wav in there. Have fun listening to those beatz, or not! Protip #3 - You can window the AC Launcher with F11. Part 2: A Whole New World – Skin Folder Setup The first step is to make sure we have a place for our PSD and DDS files have a nice cozy place to live before we bring them into this world. Go to C:\...\assettocorsa\content\cars\ferrari_458\skins. Here you will find a number of skins that come with AC and others which you may have downloaded yourself. Everyone’s will look a little bit different. As you can see I have only one default skin and a few other things that I am working with at the moment. Let’s see what is inside of the folder ‘My_First_Car’, which can be downloaded for your convince here. Wow, that’s a lot of files! The files we will be focusing on in Lesson 2 are: CARPAINT.dds preview.jpg preview_orginal.jpg ui_skin.json Whenever you make a new skin you will want to copy ALL the files from another skin folder. 'My_First_Car' is perfect for this. It has everything you should need. Open 'ui_skin.json' with notepad or any other text editor. In this file you can manipulate the information that you see on the screen when you are at the car details in the game. You can go ahead and change these values as you wish or leave them as they are for now. Caution #1– When you make a folder for a skin try to avoid using spaces in the folder name. Replace them with underscores. Protip #4 – If you put the skin name as “Undefined” in the .json file then the name of the skin will be the name of the folder it is in. In this case it would appear in-game as My_Frist_Car instead of My First Car. Part 3: Now let’s start painting! Open up your choice of photo editor. Mine is Photoshop. So whenever I say “Photoshop” read it as Photoshop/Gimp/paint.net/MS Paint/etc... Open the Ferrari template that we got from Lesson 1: Getting started. You should see something like this. The very first thing before we touch anything is save the file as 'CARPAINT.psd' inside the ‘My_First_Car’ folder. This will do two things. 1) It will keep the original template untouched so you can use it for later and 2) when you save the psd (and eventually the dds) you won’t have to hunt for the location and transfer files everywhere. For this Lesson we will skip Layer management because we won’t need to create any layers. -The first layer is the wireFrame layer. It basically shows you how the car is shaped. Basically. Use the grids to line things up in later Lessons. -The OCCLUSION layer includes the shadows on the car and blocks out the regions of the template that you will not see on the car. -The Side Panels layer contains the side panels. Easy right? -The base color layer is the layer we will be painting on today. -The Note layer is only there to display the note. The note says “Note: Alpha channel controls detail map application, black=detail”. This layer can be ignored as it does nothing here. Activate the base color layer by clicking it in the layers panel. Chose the paint bucket tool and color the layer some orange color (ff9900 for example). After using the paint bucket tool on the image you will notice that the red has changed to orange. YAY! Hide the wireframe layer by clicking the eye next to the layer and save your psd. Remember, it should be already called 'CARPAINT.psd' and located in the 'My_First_Car' folder. (If something else changed orange then you did something wrong. In most cases you did not have the correct tool selected, or you did not have the correct layer selected.) Part 4: DDS Me – DDS Export (Modified 08MAY2014) Now it is time to export the file as a DDS. This is the most experimental part of this Lesson. There are hundreds of setting combinations that will work. I’ll show you what settings I use. In Photoshop go to File > Save As. In the Format drop-down menu chose the D3D/DDS option and click save. You might get an overwrite warning. Overwrite it. Now a new menu should pop up titled NVIDIA dds Format. In the first drop-down menu chose ‘8.8.8.8 ARGB 32 bpp | unsigned’ 'DXT5 ARGB 8 bpp | interpolated alpha' . The ‘Generate MIP Map’ radial button should be selected and the number in the box should be set to '6'. Click the MIP Map Filtering button and chose the Blackman Filter type then press ok to confirm. To test out the settings click 2D Preview. A window should pop up and after a few seconds you should see decreasing sizes of pictures of your skin. Close that window and then click save. Photoshop should take a few seconds to “think” while it creates the DDS file. It took my computer about 2 seconds for this orange skin. The amount of time will increase depending on the complexity of the skin. NOTE: If you are using Photoshop CS2 and you are getting the image below then unckeck the box that has to do with 'Alpha' when saving the file. (Thank you to many people for finding this out and to JMNick1 for the image. In simple terms, CS2 was not made to deal with alpha layers and DDS files at the same time. A note about the saving format: What are the differences between the two export types? Type: ‘8.8.8.8 ARGB 32 bpp | unsigned’ vs 'DXT5 ARGB 8 bpp | interpolated alpha' Full Racing Grid PC Stress: Very High vs Medium File size (per file): 21 MB vs 5 MB Quality: Best vs Good Colors: Excellent vs Good Saving time: 2 seconds vs 12 seconds It is your choice which one you use. Part 5: Can you see it now? – Skin Preview Now it’s time to see the magic! Run AC (which launches the launcher). Chose the Ferrari 458 and then chose your skin (My_First_Car). "What is this!!?!?!" ,You scream. "It's still blue!?!? What have I done?!?!" OK, just chill. Click on the showroom preview. Viola, there is your orange beauty. Now find a really cool angle and take a screenshot with the F8 key. Don’t worry about the mouse or the menu on the screen. The game will not record those to the screenshot. Close the showroom with the ESC key to get back to the AC launcher. We are going to use that screenshot we just took to change this preview screen. Navigate to your documents folder (In my case C:\Users\Bailey\Documents\). Open the Assetto Corsa folder and then the ‘screens’ folder. In there you should see the screenshot you just took (Hats off to the AC devs who took time to make a file naming system that makes sense). What you are going to do is copy that screenshot that you recently took and put it into your My_First_Car folder. With photoshop open preview.jpg that is located in that same folder. Drag your custom screenshot into Photoshop so that it lies on top of the original preview picture. Make sure it is aligned with the move tool (‘V’ in photoshop) and then File > Save As and save as a .JPG and write over preview.jpg and then close the image. Repeat the process with 'preview_original.jpg'. The reason we are doing this is to keep the size and scale of the original preview images. Of course you can use stock images of the real car, for example, but just make sure the file is called preview and preview_original. It looks like I still have some aligning to do before I save. Restart AC and you will see that the preview images will have changed. Isn’t that neat? Part 6: Ideas for the future Well, you have now completed your first skin. Go ahead and try painting on the base layer with other colors. Can you make the roof green? How about a purple bumper? Can you get the door handles to be yellow? Take some time and explore. For now you can paint on the base layer any way you want. For the more experienced folk try making new layers just above the base layer. Make a new layer for each color for more control. Experiment with the shape tools and the pen tool. Next we are going to take a small, but necessary coffee break. If you have any questions feel free to ask anything at all. Even if it isn't related to the lessons. Lesson 1: Getting Started Lesson 2: Your First Skin Coffee Break 1: Layer Management Lesson 3: ??? Coffee Break 2: ??? Lesson 4: ??? Lesson 3: Layer Management L3 Part 1: Color Part 2: Logos Part 3: Number plates Part 4: Rip and Trash Folders You will find out that you will want to keep your work space tidy from the beginning to insure a nice and streamlines process while you work on your project. Practicing good folder management will enable you to help with this process. It is not uncommon that you could have over 60 layers in your PSD file. You don’t want all those just floating around. It would take you forever just to find a logo you want to move over by a few pixels, for example. Here I will show you how I take care of my layers so that they are neat, tidy, and if I share my work with someone else they will be able to get to work instead of taking a really long time just to learn what everything means. (Kessel racing from the GT Open Ferrari 458 Skin pack. Click for full sized image.) Part 1: Color First of all I delete any layers off of the template that I know I will not need. In the case of Assetto Corsa this almost always mean deleting the Note layer. After that I establish where the base color of the car is. I make a folder called ‘Color’ and but the base color inside of that. That folder will contain all the color layers for the car. In the case of a Corvette it may just contain a layer that is colored yellow. If that Corvette is in the GT2 class, for example, then a Black Layer would be present too so that I can paint the stripes. Part 2: Logos Above the Color folder would be the ‘Logos’ folder. Within the Logos folder I usually have folders called ‘Left Side’, ‘Right Side’, ‘Center’, ‘Hood’, ‘Back’, etc. Within each of those individual folders I would have a logo named ‘Dunlop’ for example. Of course it would make sense if that logo was a Dunlop logo. If there happens to be two Dunlop stickers on that part of the car then I would name one Dunlop_upper and the other Dunlop_lower. Personally I try to name them in relation to the template, NOT in relation to the driver. That choice is up to you. Part 3: Number plates Above the Logos folder is where I put my numberplates. Sometimes I have to make my own nameplates and other times I am able to get them from another source. If you are doing a series of cars it is OK to use logos and numberplates from the other cars. I would recommend it in order to preserve the similarities between the cars, as this is what usually happens in real life. If you are in the position that you must create a multi-part logo I would suggest that you put all the individual parts in their own folder. Because of the nature of logos on cars there is a good chance that you might use hat logo on another part of the car. If it is in a folder that you will be able to manipulate it faster and more reliably than 4 separate layers. When I work on the car I typically only work of half of the car at a time. The reason I do this is because car are fairly semictrical down the center. Once I have completed my work on the left side of the car I can just copy all the stuff I need for the right side of the car. This usually means that I will copy the ‘Right Logos’ folder and rename it ‘Left Logos’. I would then drag the entire group of logos to the other side of the car and then rotate and adjust each one individually as needed. Using this technique will decrease the time it takes to make a skin my quite a lot. You can also use this method with numberplates and even color designs that you may have made earlier (this is why I like using the pen tool with its easily adjustable masks). Remember that the most effective way to manage your folders and layers is the way that YOU decide. I remember that I used to group folders by the rename of the sponsor and that worked quite well for me. Once I got better with the pen tool I found out that I could streamline my process by doing only half of the car at a time. That decision ultimately changed the way I organize my sponsor logos. It is always p to you and the way that you like to do things. The way you create cars will change throughout your growth as you learn new things. Part 4: Rip and Trash Folders Extras: a Rip folder and a Trash folder. I have recently implemented a Rip and Trash folder into most of my projects. Let's start with the Rip folder. A Rip (pronounced the same as when you rip a piece of paper) is when you take a piece of material from something else. Like the internet for example. In my case I use Rips for reference while I paint the car, helmet, gloves, etc. I put these Rips (images of the car) in a folder on the topmost layer. The reason it will be on top is to ensure that the Occlusion layer does not get in the way of the rip. Remember that in many cases the Occlusion layer contains shadows which may produce errors when you are trying to sample colors from the rip. The Trash folder is what it sounds like. It is where you put the stuff you no longer need. You many think, "Can't I just delete that stuff?" Well, you can if you want to. The usefulness of the trash layer is that you can throw things away like the original sizes of logos for example. If you size your logo too small then you can barb the larger one out of the trash and start anew. You can also put old or failed designs in the trash. If the time comes when you want to revert to an old design just go trash diving! The trash layer is at the bottom of the PSD and hidden. Coffee Break 1: Project Folder Management CB1 How do I keep my workspace outside of the Photoshop environment tidy? There has to be a place were I put all my reference material and other resources. Well, what I do is create a folder called ‘Resources’ inside of the specific car skin folder. If the project is small then this folder is likely to contain images of the real world (or fictional) car from the left, right, top, front, and rear. With my research experience the most difficult images to acquire of a race car are the top and rear. (click here for full image) If the project is large then the ‘Resources’ folder includes helmets, gloves, tires, etc. In some cases I even have a video or two in my reference folder. It is useful to rename your reference images to something that has value. If you have an image of the top of a car then name that image ‘top’. If you have an image of the car at an angle you might want to call it 'rear quarter'. Have another image of the top? Name that one 'top2'. I have recently added a 'Logos' folder to my projects. You can either do this or you may opt to keep all your logos in a huge folder somewhere else. That is what I used to do so that I knew where all my logos were and I would not have to hunt for them. One last tip is that you might want to enable the preview window in your windows explorer. This will cut down on the time it take to see which image you might need at that moment. Lesson 4: Painting Rims L4 Today we are going to learn how to paint the rims of the cars in Assetto Corsa. This method will work for most car rims and is what I believe to be the easiest way. We will be using the Tatuus as the rim files have some notable features that will help you down the road. Make sure you have read through the previous lessons. Step 1: Obtaining the files The rim files of the cars are located with the car templates. In our case we find the Tatuus rim files in 'C:\...\assettocorsa\dev\skin_templates\template tatuus fa01'. You should see this. Copy 'Rim.dds' and 'Rim_BLUR.dds' to your desired Tatuus skin folder. I copied mine to the AC default Scheme1_A livery. Step 2: Start Paining The instructions for painting the rim apply to both files. Open the rim file in your photo editor of choice. You should see this. If you see multiple repeating rims that get smaller and smaller you have opened the dds incorrectly and need to try again with different settings. If necessary unlock the layer by double clicking the layer on the right that says Background. Now set that layer to Multiply. Create a new layer called 'Color' and paint it solid green (RGB 0.225.0) and set the layer to 'Color' (in the same way that you set the other layer to Multiply). You should end up with this. It is a little to bright for me so switch the order of the layers. Better. Feel free to change to order of the layers and play with the brightness, saturation, and contract levels to get the look you want. When you are finished export the file to dds. If you did everything correctly you should be welcomed with this work of true art! If you treat your rim blur file the same way that you treat your rim file then the transitions between the two in-game should be seamless. You will notice that there may be parts of the rim that you did not want to be green. That may be the logos, lug nuts (bolts), the outer part of the rim, or a part of a cool design. Get familiar with your photo editor and use its tools to delete certain parts of the 'Color' layer. With care and precision (AKA Magic Wand Tool in this case) you can get something like this and even much better. Remember to save your work often. Coffee Break 2: Saving Time!!! CB2 This Coffee Break has been brought to you by a fellow forum member, zelimper. He taught me this technique and it has saved me plenty of time while making my skins and while he made his skins too. I used this technique while making the McLaren GT3 Gulf Racing LLE skin. By using this technique (Actions in Photoshop) you will be able to save your skinning project with one click instead of the traditional method of clicking File, clicking 'Save As', clicking DDS, etc... With the method below you will even be able to set a save hotkey. Let us begin! 1. Actions Window Access the Actions window by navigating to the top bar of Photoshop and clicking Window > Actions. 2. Click create new action. 3. Give your Action a name. If you desire to do so you may put it in a Set and create a hotkey for your Action, but it is not necessary. 4. Go through the steps you would normally to save and resume your work. 5. Click Stop Recording. 6. You are done. Your Action has been saved. If you click play or your hotkey combination then Photoshop will go through the process of saving your file. The video below serves as a visual aid to the steps above. Note: You will have to create a new action if you want to save to a new location (for example, working on a different skin). This is why I called the action Gulf Save. I could also have RedBullSave or LotusP4-5Save. fonte AC forum
-

Assetto Corsa Competizione: modding possibile, ma non semplice (e senza supporto)
VELOCIPEDE posted a topic in Assetto Corsa Competizione
Stefano Casillo in persona ha chiarito, sul forum ufficiale di Assetto Corsa Competizione, quale sarà la posizione della Kunos Simulazioni riguardo al modding del nuovo titolo. In sostanza le modifiche di terze parti saranno possibili, per chi ne sarà capace, non saranno "vietate" nè "bloccate" da parte della software house italiana, ma non saranno supportate dalla Kunos stessa e, visto il nuovo engine all'avanguardia del gioco, non saranno sicuramente "semplici" come nell'attuale Assetto Corsa. Considerando che Assetto Corsa Competizione uscirà in versione beta ad accesso anticipato su Steam nella prossima estate e che quindi saranno necessari alcuni mesi prima di arrivare ad uno sviluppo maturo, la scelta relativa al modding del nuovo titolo vorrà quasi sicuramente dire che l'attuale Assetto Corsa non sarà "dimenticato" in tempi brevi, ma anzi potrà godere ancora di una vita intensa, anche grazie al modding attuale e del prossimo futuro. D'altra parte è pur vero che evidentemente, l'iniziale difficoltà nel modding di Assetto Corsa Competizione, fara si che probabilmente solo i modders più talentuosi si dedicheranno in modo progressivo al nuovo titolo, con una qualità delle realizzazioni di terze parti certamente superiore. Riassumendo quindi, è altamente probabile che l'attuale Assetto Corsa viva ancora a lungo e con il nuovo Competizione avremo forse un minor numero di mods, ma di qualità molto alta e soprattutto disponibili solo quando sarà il momento più opportuno. La direzione intrapresa da Casillo & soci sembra essere proprio questa e personalmente la trovo la scelta migliore. Qui di seguito la traduzione in italiano della dichiarazione di Stefano Casillo, gentilmente pubblicata da Aris Vasilakos su Facebook: "Siamo totalmente consapevoli dell’importanza del modding e del suo contributo al successo di Assetto Corsa. E’ un modo grandioso per far emergere nuovi talenti, per far si che la comunità “suggerisca” nuove direzioni e caratteristiche agli sviluppatori e per creare un prodotto più ricco. Non è una coincidenza che alcuni dei migliori modders nella nostra comunità, adesso facciano parte del team di sviluppo della Kunos Simulazioni e contribuiscano attivamente ad Assetto Corsa Competizione. Tuttavia, per ACC, questa caratteristica dovrà rimanere in “stand-by” per una serie di ragioni. La più importante è che abbiamo dato a noi stessi il compito, difficilissimo, di totale ricostruzione del nostro software, praticamente da zero. In un mondo dove ogni prodotto che trovate nel mercato simracing è una evoluzione di giochi che sono stati sviluppati 10-15 anni fa, il nostro approccio è quello di prendere una enorme falce e rasare tutto a zero o quasi, prima di cominciare con un nuovo progetto. ACC non è un eccezione. Questa volta, il compito è ancora più complesso poiché usiamo, per la prima volta, un engine di terze parti che non abbiamo disegnato noi e la verità è che, considerando il tempo a disposizione per portare ACC al pubblico, abbiamo fin troppo lavoro da fare per capire come usare l’engine adeguatamente. Pensare contemporaneamente a come renderlo moddabile e supportare i modders non è facile nel tempo a disposizione. Come potete immaginare, questo argomento è stato discusso ampiamente dal nostro team nell’ultimo anno e mezzo e - come ogni decisione - arriva con i suoi pro e contro. In qualsiasi modo la si voglia vedere, la decisione finale sarà dolorosa. Ovviamente noi siamo consapevoli e convinti di aver preso la decisione giusta, anche se perderemo gli enormi benefici di una piattaforma moddabile. Riassumendo, non ci sarà nessuna azione mirata da parte nostra relativa al modding, né per promuoverlo, né per offrire qualsiasi tipo di supporto nei forum, ma neanche nella direzione opposta, visto che non abbiamo alcuna intenzione di bloccarlo o proibirlo nel caso in cui qualche modder particolarmente capace e intelligente riuscisse a scoprire come fare da solo." ENGLISH -
Assetto Corsa Competizione: modding possibile, ma non semplice (e senza supporto)
VELOCIPEDE posted a article in Modding
 Stefano Casillo in persona ha chiarito, sul forum ufficiale di Assetto Corsa Competizione, quale sarà la posizione della Kunos Simulazioni riguardo al modding del nuovo titolo. In sostanza le modifiche di terze parti saranno possibili, per chi ne sarà capace, non saranno "vietate" nè "bloccate" da parte della software house italiana, ma non saranno supportate dalla Kunos stessa e, visto il nuovo engine all'avanguardia del gioco, non saranno sicuramente "semplici" come nell'attuale Assetto Corsa. Considerando che Assetto Corsa Competizione uscirà in versione beta ad accesso anticipato su Steam nella prossima estate e che quindi saranno necessari alcuni mesi prima di arrivare ad uno sviluppo maturo, la scelta relativa al modding del nuovo titolo vorrà quasi sicuramente dire che l'attuale Assetto Corsa non sarà "dimenticato" in tempi brevi, ma anzi potrà godere ancora di una vita intensa, anche grazie al modding attuale e del prossimo futuro. D'altra parte è pur vero che evidentemente, l'iniziale difficoltà nel modding di Assetto Corsa Competizione, fara si che probabilmente solo i modders più talentuosi si dedicheranno in modo progressivo al nuovo titolo, con una qualità delle realizzazioni di terze parti certamente superiore. Riassumendo quindi, è altamente probabile che l'attuale Assetto Corsa viva ancora a lungo e con il nuovo Competizione avremo forse un minor numero di mods, ma di qualità molto alta e soprattutto disponibili solo quando sarà il momento più opportuno. La direzione intrapresa da Casillo & soci sembra essere proprio questa e personalmente la trovo la scelta migliore. Commenti e discussioni a questo link del forum dedicato. Qui di seguito la traduzione in italiano della dichiarazione di Stefano Casillo, gentilmente pubblicata da Aris Vasilakos su Facebook: "Siamo totalmente consapevoli dell’importanza del modding e del suo contributo al successo di Assetto Corsa. E’ un modo grandioso per far emergere nuovi talenti, per far si che la comunità “suggerisca” nuove direzioni e caratteristiche agli sviluppatori e per creare un prodotto più ricco. Non è una coincidenza che alcuni dei migliori modders nella nostra comunità, adesso facciano parte del team di sviluppo della Kunos Simulazioni e contribuiscano attivamente ad Assetto Corsa Competizione. Tuttavia, per ACC, questa caratteristica dovrà rimanere in “stand-by” per una serie di ragioni. La più importante è che abbiamo dato a noi stessi il compito, difficilissimo, di totale ricostruzione del nostro software, praticamente da zero. In un mondo dove ogni prodotto che trovate nel mercato simracing è una evoluzione di giochi che sono stati sviluppati 10-15 anni fa, il nostro approccio è quello di prendere una enorme falce e rasare tutto a zero o quasi, prima di cominciare con un nuovo progetto. ACC non è un eccezione. Questa volta, il compito è ancora più complesso poiché usiamo, per la prima volta, un engine di terze parti che non abbiamo disegnato noi e la verità è che, considerando il tempo a disposizione per portare ACC al pubblico, abbiamo fin troppo lavoro da fare per capire come usare l’engine adeguatamente. Pensare contemporaneamente a come renderlo moddabile e supportare i modders non è facile nel tempo a disposizione. Come potete immaginare, questo argomento è stato discusso ampiamente dal nostro team nell’ultimo anno e mezzo e - come ogni decisione - arriva con i suoi pro e contro. In qualsiasi modo la si voglia vedere, la decisione finale sarà dolorosa. Ovviamente noi siamo consapevoli e convinti di aver preso la decisione giusta, anche se perderemo gli enormi benefici di una piattaforma moddabile. Riassumendo, non ci sarà nessuna azione mirata da parte nostra relativa al modding, né per promuoverlo, né per offrire qualsiasi tipo di supporto nei forum, ma neanche nella direzione opposta, visto che non abbiamo alcuna intenzione di bloccarlo o proibirlo nel caso in cui qualche modder particolarmente capace e intelligente riuscisse a scoprire come fare da solo." ENGLISH
 -
 Dopo il rilascio della nuova versione di Assetto Corsa, i modders non sono di certo rimasti a guardare, rilasciando in pochi giorni le release aggiornate e compatibili anche dei loro lavori. Vi segnaliamo quindi i mods ed addons più interessanti e da non perdere: partiamo con l'app Ferito - livecartracker, quindi l'International Formula Series 3 by MAK-Corp, la Mazda 787B v1.2, Zakspeed Escort GR.5 DRM, European Racing Truck, Lada VFTS, Ford Sierra Cosworth RS500 1987, Corvette C6R 2013 by UnitedRacingDesign, Nissan Primera BTCC 1999, concludendo con i circuiti di Monte Carlo Special Stage by TTM (screen sotto), Albi 1967 e TT Circuit Assen. Insomma sotto con i download!
 -
Kunos Simulazioni ha appena pubblicato questo interessantissimo video dedicato ai tool ufficiali con cui i modder potranno importare i loro lavoro in Assetto Corsa. Se siete tra coloro che realizzano contenuti aggiuntivi per il sim, sicuramente sarà una visione interessante. The Assetto Corsa SDK is available for download in the Steam Library > Tools \ Tab, and includes a free sample track for training and testing Dopo il rilascio della nuova build, il team Kunos Simulazioni ci mostra con un video tutorial come fare per la creazione di una vettura personalizzata con l'editor di Assetto Corsa. Qualche altra informazione utile da Aris.
-
 Dopo il rilascio della nuova build, il team Kunos Simulazioni ci mostra con un video tutorial come fare per la creazione di una vettura personalizzata con l'editor di Assetto Corsa.
 -
 Kunos Simulazioni ha appena pubblicato questo interessantissimo video dedicato ai tool ufficiali con cui i modder potranno importare i loro lavoro in Assetto Corsa. Se siete tra coloro che realizzano contenuti aggiuntivi per il sim, sicuramente sarà una visione interessante. We're glad to introduce the first tutorial regarding modding tools of Assetto Corsa. Modders will have access on the same tools used by the developers. This Friday we will release the graphics editor in beta version, that permits to import and edit 3D files and export in Assetto Corsa format.
 -
Il noto portale SimHQ ha appena pubblicato una preview di rFactor 2, anteprima nella quale sviscerano i vari aspetti dell'atteso simulatore ISI. Ciascuna pagina mostra elementi nuovi e serve a farci capire cosa ci troveremo davanti nel momento in cui verrà pubblicato l'eseguibile. Questo messaggio
-

Logitech G27 con Thrustmaster F1 Rim
Black Box posted a topic in Simracing hardware - Periferiche di guida
http://www.youtube.com/watch?v=UJNWcZ0g5RI&feature=related dovremmo aprire una sezione apposita per il modding...o dedicata alla mia tendenza a chiaccherare troppo XD XD XD Visto che non c'è molto da dire...lascio parlare le foto... PRIMA... G27-E_GT Style_based on Porsche 997 RSR cup DOPO...!!! G27-E_Based on_ Ferrari F1 2011 stile ...per inciso: passi che essendo grafico so usare bene photoshop, ma questo NON è un fotomontaggio...ehehehehe... scusate le foto "scarse" fatte col palmare. La polvere viene evidenziata dal flash...in verità non ce n'è così tanta Non fate caso ai cavi, cavetti, cavi spiralati, schedine di controllo...è tutto normale. Se vedete il resto della camera è pure più incasinata.. Non correndo praticamente MAI lascio tutto in giro, e mi limito a "testare" le cose... Il volante TM è molto carino. L'impugnatura effettivamente è piuttosto sottile, ma direi che è piacevole, e ci si fa presto l'abitudine. Il cambio a farfalla a bilanciere è....migliorabile. Manca la frizione analogica, ma...non mi interessa installarla...appena finisco il mio bel GP2 questo se ne va al "mercatino"...eheheehee... Ho modificato un vecchio mozzo del G25 per installare il TM sul corpo volante del G27 (il mozzo è lo stesso, cambia solo l'attacco della corona). NON è attaccato con la colla...!! che pensate. E' stato fissato con le viti autofilettanti dell'albero del G27, quindi la solidità è la STESSA del volante G27 originale montato sul suo mozzo. Alla fine si tratta sempre di plastica...cosa vi aspettate..!!! Appena collego l'elettronica vedo di postare un bel video, magari usando F1 2011 con il G27-E così vedete quanto spinge
